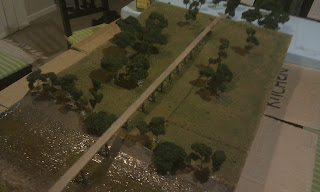
My wife was out for the evening, so I took the opportunity to sneak some stuff into the warm house, take over the dining table and add some more trees to the module, Quite happy with how it's looking, not sure I ever want to transport it with all this flora sticking up in the air, I think the effect is pretty good, even the river does not look as bad as I thought, it should repair up nicely.
The scene is based on photos, with some poetic license to try and make it look right in my eyes.
Tuesday, June 5, 2012
Sunday, June 3, 2012
Failure can be an option
Taking my first crack at making "water". It was suggested that a medium worth trying was automotive 2 pack clear, the hardener allowing it to dry far quicker than if it was just an acrylic automotive clear.
Now, I was really nervous that the thin shell of paint and plaster that I built up over my blue foam base, if the clear makes it past the outer layer, it will make a mess of the EPS foam.
Of course, there was a tiny section that wasn't sealed, so approx 400ml of clear has disappeared under the shell... even worse, because it ate away the foam under the river, it caused a hollow piece, which in turn created a crack in the river bed, allowing the rest of the clear to fill underneath.
The whole idea is now pretty much a write off, I'm kind of hoping now that once the clear dries fully and seals up everything, I'll use something like Woodland Scenic EZ Water to build up depth and fix the river. I am certainly going to use this method again for small puddles etc on my dirt roads, but in bulk, it has proven to be a bit of a disaster.
Friday, June 1, 2012
More purchasing, not much work (but soon)
Thanks to the good folks at Murray Bridge Trees and Terrain here is another bunch of trees to add to the modules, these will for the most part cover the river bank, with some to be spread amongst the larger trees.
Now what VR era layout would be complete without a WT gracing the rails, I'm yet to assemble my kit that I purchased from Spirit Design but I've pilfered several photos from the website to show what mine will hopefully look like.
Having run past the idea of using the Tam Valley servo setup for controlling points with a few club members, the idea got a big thumbs up, so the next purchase will be these, hopefully, the same few club members will help me install them, and then Maffra can commence in earnest.
Making a start on what will be the major section still seems a bit daunting, I am still very nervous about making mistakes, but that's how we all learn, I just hope I also learn how to fix those mistakes along the way.
Subscribe to:
Comments (Atom)


